Adventures with the G pad GPR 3D: Unearthing Treasures in Wet Soil
Recalling last weekend’s outing with Mike and my kids, where we explored the rich, muddy banks of our local river, makes me especially excited to share the capabilities of the G pad GPR 3D. Using this sophisticated 3D Ground Penetrating Radar, our adventure wasn’t just a muddy play; it turned into a treasure hunt that revealed more than just wet soil beneath our feet. Today, we delve deep into understanding this technology, making every scan an exciting reveal of what lies hidden below. The thrill of discovering and analyzing underground secrets in real-time is a game changer for any enthusiast!
Unveiling the Secrets of Wet Soil: The G pad GPR 3D Experience
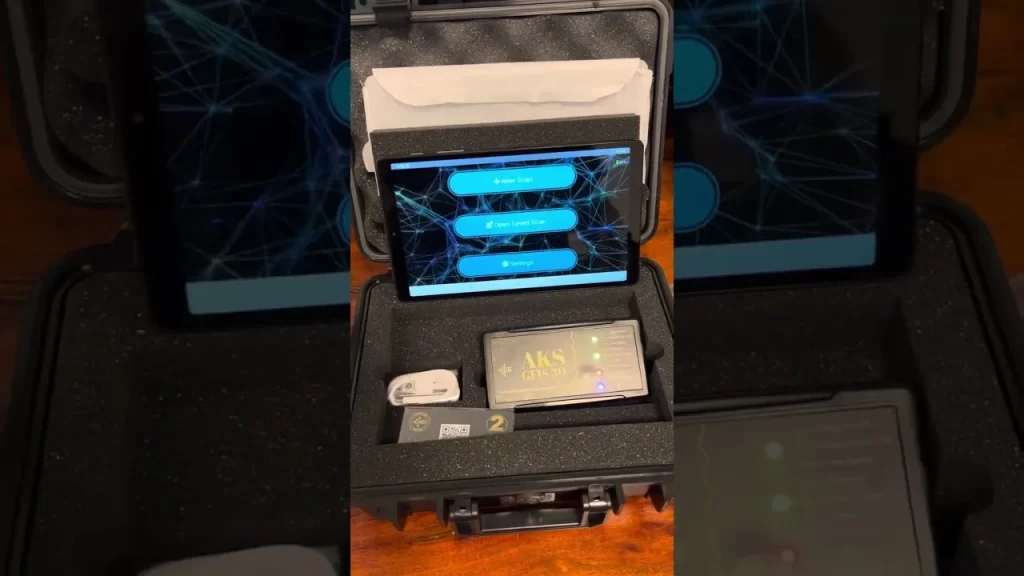
The first time I switched on the G pad GPR 3D, I was knee-deep in the notoriously challenging wet soils by the riverbank, an environment where many detectors struggle. But not the G pad. This device, equipped with Ground Penetrating Radar (GPR), dived into the muddy abyss with precision. The high-resolution 3D imaging illuminated the screen of my tablet, revealing layers of history hidden beneath the soggy surface. Each scan felt like peeling back pages of a damp, earthy book — each layer telling a story of yore.
Unlike conventional detectors, the G pad GPR 3D adapts, making it a jewel for any advanced metal detecting enthusiast. In our recent expedition, as we adjusted the device settings to better suit the mineral composition of our local wet soil — using real-time data feedback — we uncovered an old coin that might have easily been missed by less capable equipment. It was a moment of pure adrenaline, turning an ordinary afternoon into a chapter of our own little history.
Optimizing GPR Settings for Maximum Depth Detection
Tuning the G pad GPR 3D is like setting up a high-end sports car; every little adjustment can enhance performance drastically. Under the ‘View Scan’ in the app, I meticulously selected our scan saved from last month’s adventure. Choosing the correct soil setting is crucial, as reflected in our choice of the ‘clay wet’ option which perfectly matched our current terrain. This precision allows for deeper and more accurate detection, pushing the boundaries of what we can discover beneath our feet.
The real game-changer came when we experimented with the contrast and saturation levels through the app’s interface. This GPR’s ability to modify image attributes directly impacts how targets are visualized, which is critical when searching for minimal conductivity items like ancient artifacts. Could there be anything more thrilling than adjusting your device and immediately watching as forgotten treasures take shape on the screen? With the G pad GPR 3D, each outing promises new surprises, nestled securely in layers of soil, just waiting to tell their tales.

Transforming Mud into Treasures: Practical Scanning Tips
The magic begins the moment we fire up the G pad GPR 3D. Armed with its practical scanning capabilities, even the thickest mud or wet soil becomes a gateway to hidden relics. For those new to this thrilling hobby, selecting the right settings on your GPR device is paramount. Setting up at the river’s edge, I often start by adjusting the scanning depth to align with the specific soil conditions, which in our case, is typically rich with clay and organic material. The device’s user interface is intuitive, guiding even the most amateur treasure hunters on how to optimize their scans for the best results.
The G pad GPR 3D excels in various terrains but truly shines when dealing with mineral-rich wet soils that typically complicate detection. By increasing the contrast and utilizing the saturation adjustments available in the GPR system, the subtle distinctions between soil types and hidden objects become markedly clear. This functionality not only enhances the detection but also turns every outing into an adventure, promising the excitement of a potential find with each scan.
Decoding the Depths: Analyzing GPR Data for Precise Finds
What truly sets the G pad GPR 3D apart from others is its ability to analyze GPR data with precision. After a long day in the field, there’s nothing quite like bringing the data back for detailed analysis. The device allows for adjustments even post-exploration, ensuring every piece of data collected can be scrutinized for hidden details that were perhaps missed during the initial discovery phase. This deep dive into the data is not just analytical; it’s where the buried stories of the past begin to unfold, revealing objects and artifacts that paint a picture of historical significance.
Whether it’s a coin from the early 20th century or remnants of a forgotten settlement, the G pad GPR 3D’s analytical tools offer a window into history. The thrill of uncovering these finds is exhilarating — it’s about more than just treasure hunting; it’s about reconnecting with the past. Each session with the G pad GPR 3D ensures that no stone is left unturned, no clue is left unexplored, making every scan a step closer to unraveling the mysteries lying dormant just beneath our feet.
| Product Name | Features | Pros | Cons | Categories |
|---|---|---|---|---|
| G pad GPR 3D |
|
|
|



0 Comments